Is It Good to Have Plants in Home?
September 15, 2021
Top 5 Tips On Kitchen Interior Design
December 6, 2021Is It Expensive To Install Outdoor Decking?

Is it expensive to install outdoor decking? Installing an outdoor deck is a project worth undertaking, and it’s not as difficult as one might expect. However, like any other home improvement job, it requires thorough planning to achieve satisfactory results. The first thing you have to do is decide what type of decking material you want to build the deck.
Before doing that, however, take into account several factors that will affect this decision. Read on – Is It Expensive To Install Outdoor Decking?
What type of finish do you intend to use?

There are three basic materials used for finishing decks: pressure-treated pine, redwood, and cedar. Pressure-treated pine is the cheapest option, but it also tends to warp a lot faster than redwood or cedar once exposed to the elements.
If you go with a pine deck, you will need to re-stain it within two years of installation. Redwood and cedar are more expensive than pine, but they do not warp over time.
If you use either one of these materials, the only maintenance required is an annual coat or two of stain/sealer. You can also apply a fresh coat every couple of years to maintain the wood flooring‘s rich color.
What type of look are you going for?

Redwood and cedar decks offer a classic look. At the same time, pine is usually seen as the material best suited for practical purposes (although this doesn’t mean that redwood or cedar can’t serve such function). On top of that, both redwood and cedar are rot-resistant materials that can remain standing even if they are exposed to moisture for an extended period.
Is it expensive to install outdoor decking?

You can save money on your outdoor decking by having it installed professionally. Labor costs are a significant expense in this type of project, so it’s wise to hire a pro – even if you plan to do much of the work yourself.
Average Cost Of An Outdoor Deck

The average cost for an outdoor deck is $7,150, but prices vary depending on where you live and what features you want. For example, decks with more intricate designs or additional amenities like built-in benches or covered porches typically cost more than simple rectangular decks without railings.
It’s important to note that these figures factor in both materials and labor; though you might be able to cut costs by doing some of the work yourself, you won’t necessarily save a lot of money.
How Much Does It Cost To Install Outdoor Decking?

Outdoor deck installation costs $4 to $12 per square foot. This figure includes supplies and labor for posts, beams, joists, and stringers – all necessary components for building a deck.
Because these prices are averages only meant to give you an idea of what other people in your area spent on outdoor decks, it’s wise to get quotes from several local contractors before hiring one.
Tips for installing outdoor decking

Getting that perfect look for your backyard or family room is made less complicated when you consider building an outdoor deck. There are many choices of materials to use, colors and styles to pick from, but what makes it most easy is the usage of an above-ground kit.
When considering simple tips on building a DIY deck, using this kind of kit will undoubtedly save you money and time.
A laying space
You need a flat location to quickly set up the structure that includes joists, beams, and wooden planks to form the surface layer. Ensure there’s enough room between these structures so one can efficiently work without worrying about getting hit by falling tools or boards during construction. You also need access to water and electricity.
Suppose you’re considering building a deck in your backyard. In that case, you must designate some space for it and ensure that there is enough room between the structure and your home so tools and materials won’t fall on people or pets while working with these materials. You also need access to water and electricity for this project.
All about the kit
Most of the time, when dealing with DIY decks, you will require sturdy equipment such as saws, drill bits, glue guns, and clamps which are readily available at any hardware shop around town. If most of the components aren’t included in your kit, then you might want to purchase them separately along with deck screws.
It is essential that all components of the kit match so you’ll have the ability to produce a smooth surface.
Getting your materials ready
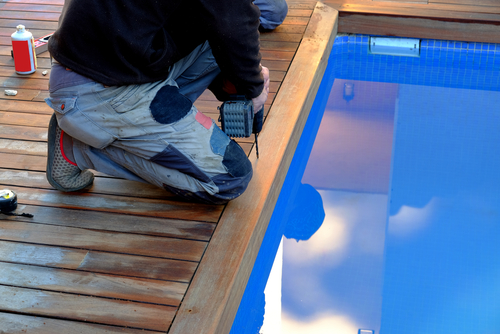
- After assembling the kit, the first thing you will need to do is lay it out on top of its designated area. The beams must match up at their joints without any gap between them while also making sure the joists are flush against one another. You will then need to drill holes through each beam at every joint before inserting nails within the holes, which will securely connect the beams.
- You will require some equipment like saws, drill bits, glue guns, and clamps available at any hardware store around town. If most of the components aren’t included in your kit, then you might want to purchase them separately along with deck screws. It is essential that all components of the kit match so you’ll have the ability to produce a smooth surface.
- Once you’ve laid down all the joists, it is time for you to attach the plywood sheets on top after drilling small holes together with a nail through each beam before securing these sheets altogether. You may need assistance while doing this part since plywood tends to be heavy, especially while working by yourself.
As soon as you’re done with the surface, you may now start putting in your decking boards. You must lay down a T-profile aluminum footing on every panel, so it’s flush against each of the beams and joists before nailing them together.
These fasteners should be spaced about 16 inches apart so one board will perfectly align with another which creates a flat surface for laying your decking boards.

A great example of an above-ground kit for building outdoor decks is presented. This site features different sizes and styles of kits that are assembled with step-by-step instructions to help you reduce any possible frustrations or problems that may occur during the design process.
Once done with this part, then consider screwing down the deck boards before putting the finishing touches on your beautifully designed deck.


