
How A Home Interior Design Can Affect Your Moods
February 4, 2022
Tips For Choosing The Right Kitchen Cabinet
May 9, 2022Home Cleaning Checklist After Renovation

Home Cleaning Checklist After Renovation – Home renovation is one of the most challenging yet satisfying projects, but it usually comes with a hefty price tag and often causes a lot of mess. There’s so much dust in the air that you can’t see across the room, paint on every surface, and all sorts of new smells. Below is a home cleaning checklist after renovation;
1. Dust all surfaces

Begin by dusting shelves, cabinets, and all surfaces that would likely collect dust over the long period of renovation. Keep a small dust cloth and duster with you in your cleaning kit, so that you can wipe down surfaces whenever you need to. Use a vacuum cleaner with a soft brush attachment – this will pick up the dust without damaging your paint.
2. Remove all the furniture
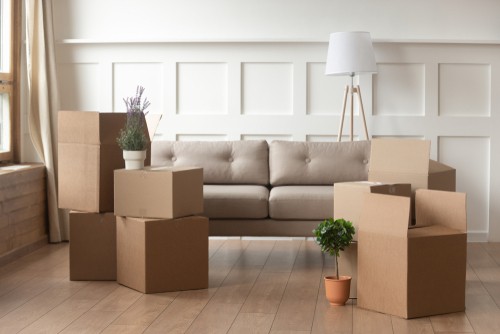
Moving all the furniture in your house may not be easy but it’s important to keep the floors clear of objects while you’re working. If you just can’t part with your sofa, only move it as far as possible and put down a plastic sheet on the floor under it. This will make it easier to clean up any spill or dust that falls through the cracks.
Now is also a good time to fix any scratches on your wooden furniture and polish them if needed.
3. Clean your walls

After you’ve removed the furniture, it’s time to clean your walls. The dust that has settled on them may contain toxic lead, so it’s important to wipe them down with a damp cloth and mild detergent before repainting. You can also use a wallpaper steamer to remove any glue or stickiness from recently hung wallpaper.
4. Clean Air Vents

All dust, dirt, and grime accumulate on the air vents as a result of dust and other particles floating in the house. It’s important to take care of these before you paint, as any particles found on them can lead to problems when spraying paint.
This is an important job to do before you get started, as cleaning up all that dust, later on, can be a big mess. Be sure to screw off the metal grills and wipe down the vents with a damp cloth, taking care not to damage them.
5. Clean windows, glass surfaces, and mirrors

Get out your squeegee and clean all windows, glass surfaces, and mirrors. This includes curtains and blinds. Use a mild detergent to clean the window sills, window frames, and mirrors before you wash them off with water. Ensure that dry cloths are used to dry them off.
6. Clean furniture and appliances

Polish up any wooden furniture with a soft cloth and polish. If you need to remove sticky substances, use a little bit of nail polish remover instead of abrasives. Clean appliances such as refrigerators, dishwashers, and stoves with soft cloths.
7. Wipe down all surfaces

Wipe down all surfaces including the walls, floors, and ceilings again with a damp cloth and detergent after you’ve removed the dust. Use a squeegee and dustpan to gather any dust and return it to the bag. If you want to get rid of the smell of paint then wipe down your wall with a damp cloth and light citrus cleaner, this will give it that fresh scent.
8. Check on Overlooked Areas

Pay special attention to overlooked areas such as light switch covers, hinges, and doorknobs. If you’re using a new water-based paint, then use a dry cloth to wipe down the surface. If you are using oil-based paint, then wipe the surface down with a damp cloth and clean with a little bit of paint thinner.
Cleaning your lights is an important aspect of house cleaning. Dirt and grime can get stuck in the light fixtures and will interfere with visibility as well as from keeping your home looking neat so it is important to clean them regularly. Use a soft cloth and wipe them down with warm water to get rid of the grime and dirt that has built up over time.
9. Mop the floors
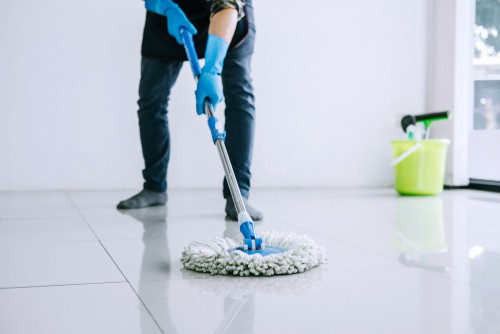
Take time to mop the floors before you move furniture back in! This will ensure that there is no dirt or dust stuck under your floorboards. Clean up any spills immediately, but leave a thin layer of grime behind – this will help to prevent scuff marks on your floor.
Make use of disinfectant to clean the floor underneath and behind furniture, this will make it easier to sweep. Also make sure that you have a good quality mop with a long handle and wide head, as you’ll be able to work around the corners more easily.
Disinfectants can be used on the floors and walls of the kitchen, bathroom, and toilet areas. You can use this to kill germs, bacteria, and viruses on hard, non-porous surfaces.
10. Wash all rugs

You will also find that a lot of dirt and dust is stuck in your rugs, so make sure you put them through some water to get rid of all the grime. This can be done at either end of the year or at any time during the year. A cheap rug wash can be bought from a hardware store or your local home improvement store. Just make sure you check the label and avoid using cleaners containing bleach.
11. Return and arrange your furniture
Return all your furniture to the room in the order it was in so that it looks as if nothing has changed at all. If you’re moving furniture to a different room, make sure you buy a good quality mat underneath so that there are no scuff marks on your new furniture.
12. Spray air freshener
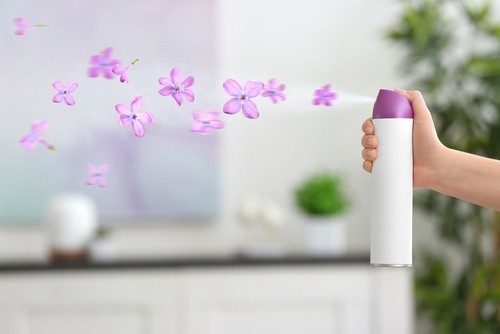
Use spray air fresheners to give your home a nice clean, fresh scent. This is particularly important if you’re using oil-based paint, as these are known to leave behind a strong odor. Moreover, spraying air fresheners instantly makes a room look more presentable.
Home Cleaning Checklist After Renovation – Conclusion
Home cleaning after a renovation may not be everyone’s cup of tea, but it’s worth taking the time to do it right. It can start as a chore, but in the end, you’ll be glad you took the time to do so! Good luck!


